Overview
This is a walkthrough written tutorial, accompanied with image step references, of how to dual-boot Ubuntu (Linux) and Windows on an existing Windows PC or laptop. Achieving this a couple of years ago was much more complicated, but given the investment from Canonical and the open source community into Ubuntu and Linux, the installation process has become much simpler and quite intuitive to follow.
As a disclaimer:
Do not shy away from this if you are a new developer and just starting your first installation. To avoid major risks, backup all your files on your Windows OS before starting this installation - if done incorrectly, there does exist a small chance that you can overwrite your entire OS (I did this once!). That said, if you manage to create a backup for yourself, do not shy away from this opportunity to learn something completely new even if you fail the first time.
Requirements
8 to 32 GB USB Flash Drive
Windows OS with 50 to 100 GB of free space, intended solely for the Ubuntu OS
Overview of All Steps
Download Ubuntu
Flash the Ubuntu ISO Image to a USB
Shrink Storage Space and Create a Partition inside Windows
Changing the Boot Order in BIOS to Allow Ubuntu Bootup
Boot Ubuntu from USB
Install Ubuntu - Part 1 - First Steps
Install Ubuntu - Part 2 - Customize the Partition Setup
Install Ubuntu - Part 3 - Complete Remaining Installation Steps
Restart and Select Ubuntu in Boot Selection
Step 1 - Download Ubuntu
https://ubuntu.com/download/desktop
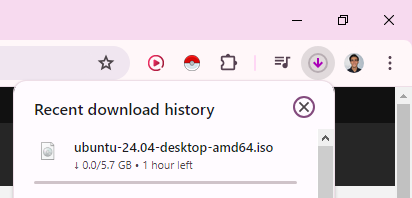
The first step is to go to the Ubuntu/Canonical website to download a file
The file type is known as an ISO image (like a text document might be a Docx file type) - and this type of file is known as an archive file of an optical disc, like a CD/DVD or Blue-ray dic - this means that it is a complete copy or the entire disc (same underlying data formatting structure)
The reason we get an ISO image is because computers are designed to boot up from extended media, commonly CDs/DVDs in past history - nowadays, we can utilize a Bootable USB program to transfer this ISO image onto a USB, saving us the necessity of acquiring a physical CD/DVD, and somehow inserting it into our computer to boot up from it? (is this even possible anymore? o,o)
I always recommend that all beginners and intermediates download the latest Ubuntu ISO image from the website - only download a specific version if you are intending on installing advanced software that may not be compatible or ready for the newer versions (not common)
Step 2 - Create Bootable USB
The next step is to transfer this ISO image onto a USB
Recall that the requirements of this video stated the need for a physical USB flash drive - and the reason for this is that we need a bootable media device where to store the Ubuntu operating system so that we can start it
For full context, the entire Ubuntu OS is not stored on the ISO image - instead, we store a lightweight version of it that comes alongisde with the installation program to be able to write the entire Ubuntu OS to our computer’s hard disk
Go to Rufus or balena Etcher to create this image
Rufus Menu Instructions
Select USB
Select Ubuntu ISO Image
Options
Rufus
Etcher Baena
Alternative 1 - Use Rufus
Alternative 2 - Use balenaEtcher
Step 3 - Shrink Storage Space on Windows
Every computer comes with one or more hard drives - known more technically as non-volatile memory - which is a term used to specify a type of memory that persists after power is lost
Almost all consumer computers also come pre-installed with an operating system (macOS or Windows) - a main program that is typically installed on the main hard drive (disk) - and where the OS specifies a certain amount of space that it reserves in the future for the ability to store more data
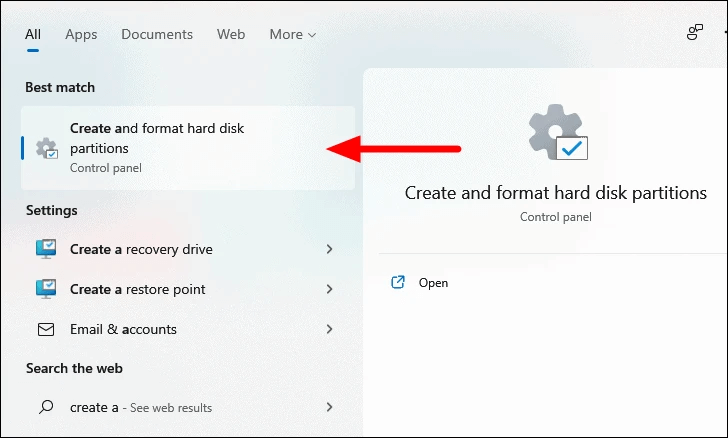
By searching using the Windows key “disk management”, we can select the Create and format hard disk partitions to open up the Disk Management Menu - which will allow us to split our hard drive space that Windows is using into two spaces - one remaining for Windows, and a second one for Ubuntu
It is recommended that we open up 50 to 100 GB of storage space for the Ubuntu OS, even if we’re hard cloud users, since it will give us the opportunity to store a sufficient amount of developer tools and utilities
Disk Management Instructions
Search ‘disk partitions’ on Windows
Select Create and format hard disk partitions
Look for the C-Drive, right click and select Shrink Volume
Recommended amount of 50 to 100 GB minimum for Ubuntu for everyday use
Step 4- Changing Boot Order in BIOS
Once we’re partitioned the hard disk, we’re all done with the configuration steps on the Windows side. The final step to achieve is to disable something known loosely as Fast Boot Mode, which is a specific type of configuration that allwows computers to boot up quickly into a default operating system by bypassing the set of boot-up options that a boot loader commonly allows
Almost all users will never dual-boot, partition an operating system or have to deal with the bootloader, which is why this is commonly hidden. That said, we will need to utilize the boot loader in this scenario.
The first step to achieve this is to go into our Windows Security Settings and to restart the computer in Advanced mode
The second step will come in the boot loader, specified in the BIOS section below, where you want to ensure as well that the Secure/Fast Boot is also disabled at the BIOS-level
Config on Windows
Search ‘boot’ in Windows search menu
Select Change advanced startup options
Click Restart now on Advanced startup
BIOS
On bootup, click F2/DEL key to trigger the UEFI BIOS Boot Mode
In Boot Options, select your USB as the Option 1
Set Secure Boot to Disabled or Other OS to prevent Fast Boot
Step 5 - Boot Ubuntu from USB
Once the BIOS options are configured as specified above, you want to retart the computer and it will specify the media that you want to boot from - at this step, we will select the Try or Install Ubuntu option
On the GNU GRUB, select Try or Install Ubuntu
Installation
Once we’re inside the lightweight Ubuntu operating system, we’ve achieved the hadest parts of the dual-boot process. At this point, we’re going to to through the installation of the OS onto our computer as if it were a normal OS or typical installation. The first steps are specified below:
Go through the Ubuntu Installation
Select Language = English
Accessibility → Next
Connect to Internet / Wi-Fi
Install Ubuntu with Interactive Installation
Start with Default selection of apps
Install recommended software
Checked - Install 3rd party for graphics and Wi-Fi hardware
Checked - Download and install support for additional media formats
How do you want to install Ubuntu? Manual installation
Check both options
Step 7 - Customize the Partition Setup
There does come a step where it will require is to be more careful - when we reach the partitioning step, we want to make sure we select the Manual Partitioning option. Recall that all that partitioning means is the ability to split up our hard disk into a reserved number of areas, one or more for each operating system installation that we have, which allow them to store and retrieve data from it.
Since Windows and Ubuntu store and retrieve data in unique ways, each of them must have their own partition. It is crucial to note here that in specifying the partition for where to install the Ubuntu OS, we MUST NOT overwrite our Windows OS - since it the process we can lose the Windows OS and all our data. Be sure to follow the steps specified below:
Manual Partitioning
Do not modify the Windows Boot Manager or Windows OS under any circumstance
Identify the Free space partition that you created when inside the Windows OS, based on the size
Create Main Partition
Select the free space
Click the “+” button
Use the entire size
Use as: Ext4
Mount point: / (root)
Select Boot Loader Installation
Select the dropdown
Select the disk for where you created the partition (if there are multiple)
Select Next
Step 6 - Install Ubuntu
Remaining Steps
The remaining steps are just to complete the installation process and then click Install. Once the installation is complete, you will simply restart the computer and be able to boot up from either Windows or Ubuntu.
Create account
Name
Computer’s name
Username
Password
Step 8 - Complete Installation
Install Ubuntu - Do not remove USB until it tells you and the installation is complete
Step 9 - Boot Selection - Windows and Ubuntu
Boot again - You will see a few options - one for Ubuntu and one for Windows Boot Manager


